
Events
Create a paid event with ticketing
Camp, competition, seminar: online registration, billing, capacity management, screen by screen.
Updated May 23, 2026
Create a paid event
An event in Kimono can be free or paid, open to members and/or external participants, with online registration and automatic billing.
Covered examples: weekend camp with a guest coach, internal competition, grading, gala night, paid technical seminar.
This guide walks you through the event creation, screen by screen.
Where to find the form
Admin panel → Events → Create.
Step 1 — General information
Identify the event.
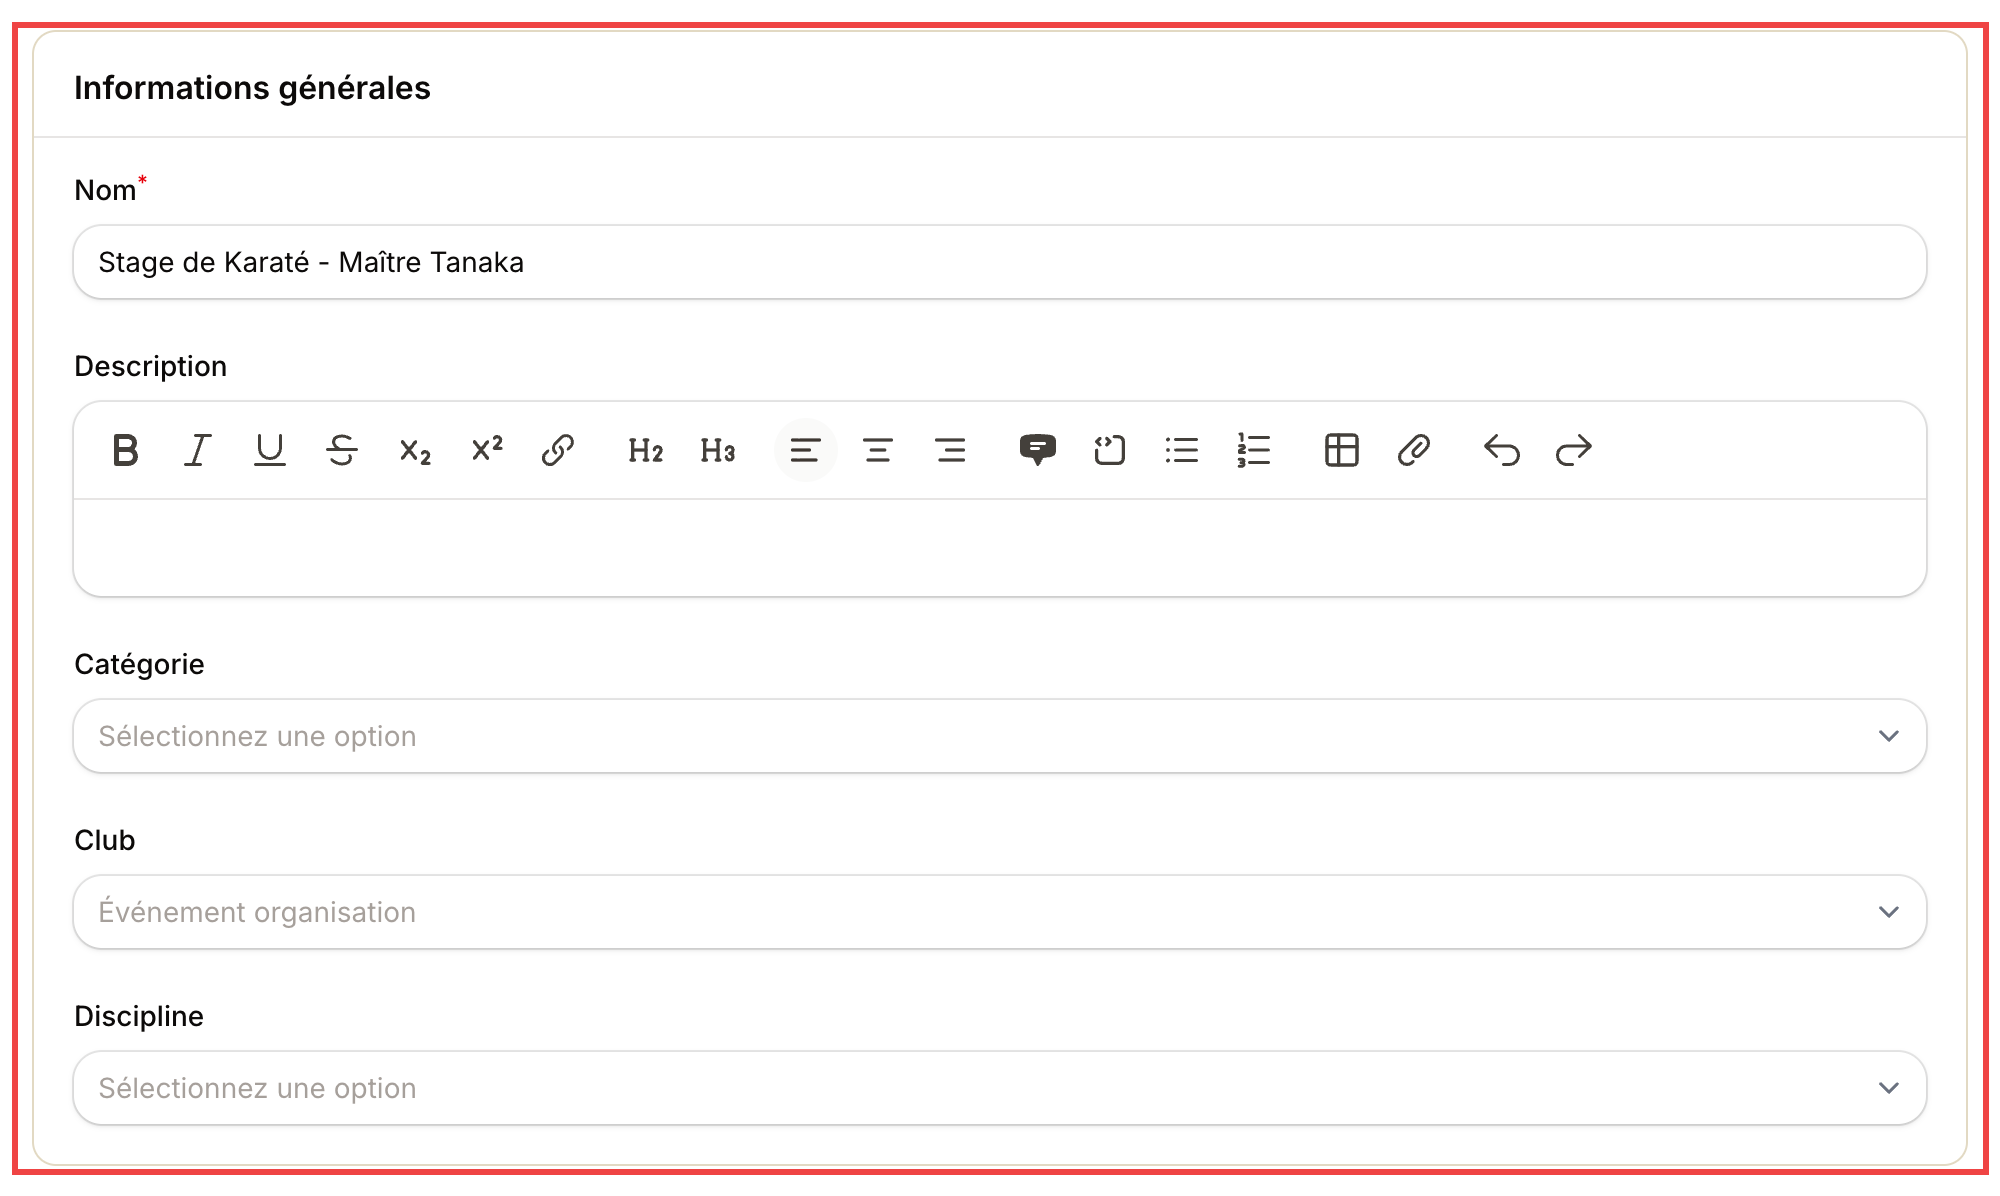
The name appears as the title on the public page and tickets. The description accepts rich text (bold, lists, headings) so you can sell the event well.
| Field | Used for |
|---|---|
| Name | Shown as title on the public page and emails |
| Description | Rich text: program, speaker, equipment to bring |
| Category | Camp / Competition / Grading / Other (configure under Organization) |
| Club | Organizing club. Organization event = applies to all clubs |
| Discipline | Which martial art is involved (filters on member side) |
Step 2 — Location and timing
When and where.
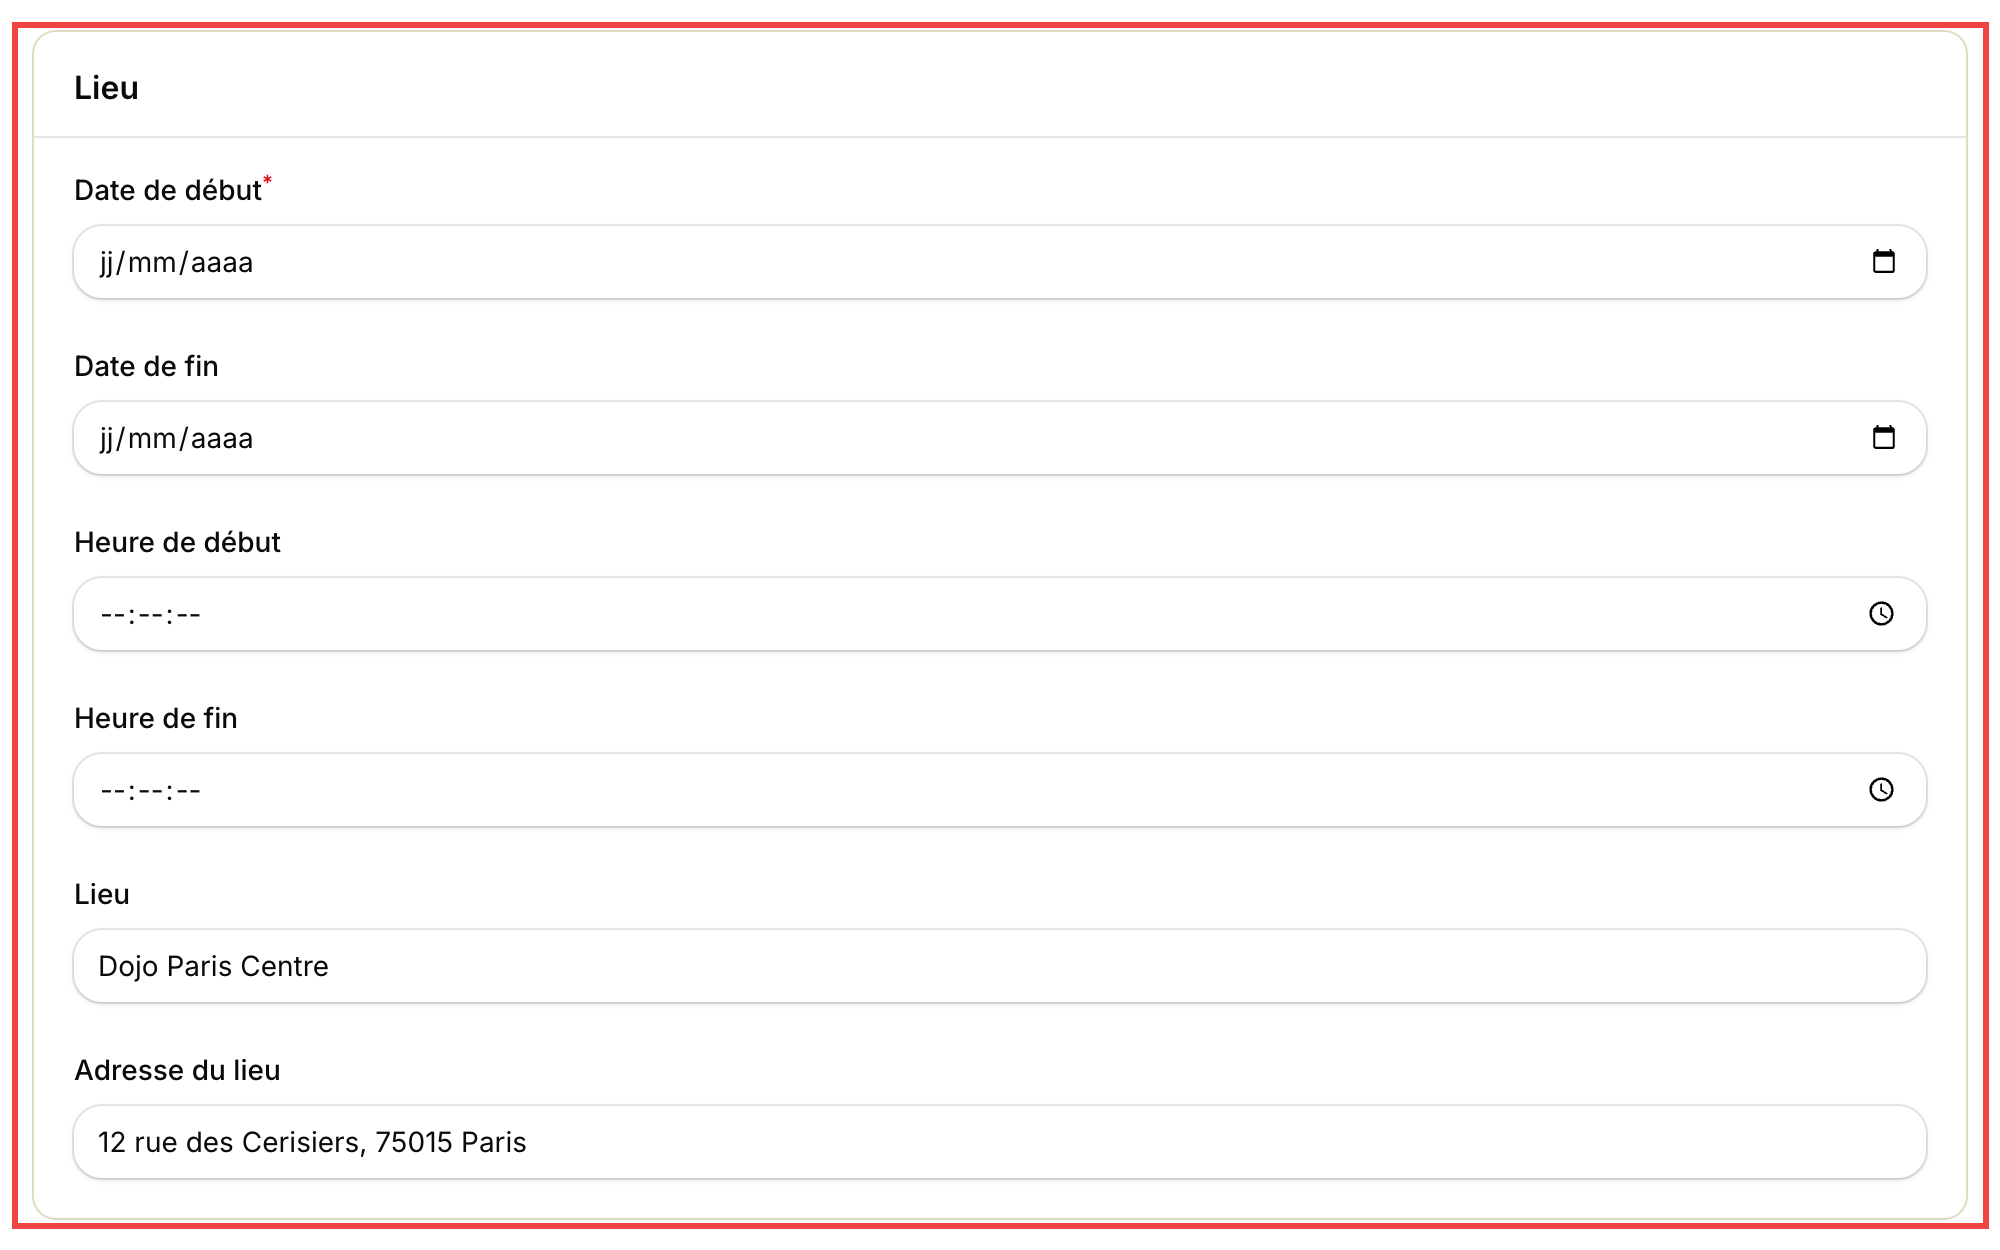
For multi-day events, fill the end date. Otherwise leave empty: the event runs only on the start date.
| Field | Used for |
|---|---|
| Start / End date | Event span |
| Start / End time | Exact times |
| Location | Venue name ("Paris Central Dojo", "Municipal stadium") |
| Venue address | Full address. Linked to Google Maps on the public page |
Step 3 — Capacity, visibility, payment
How many seats, who can register, paid or free.
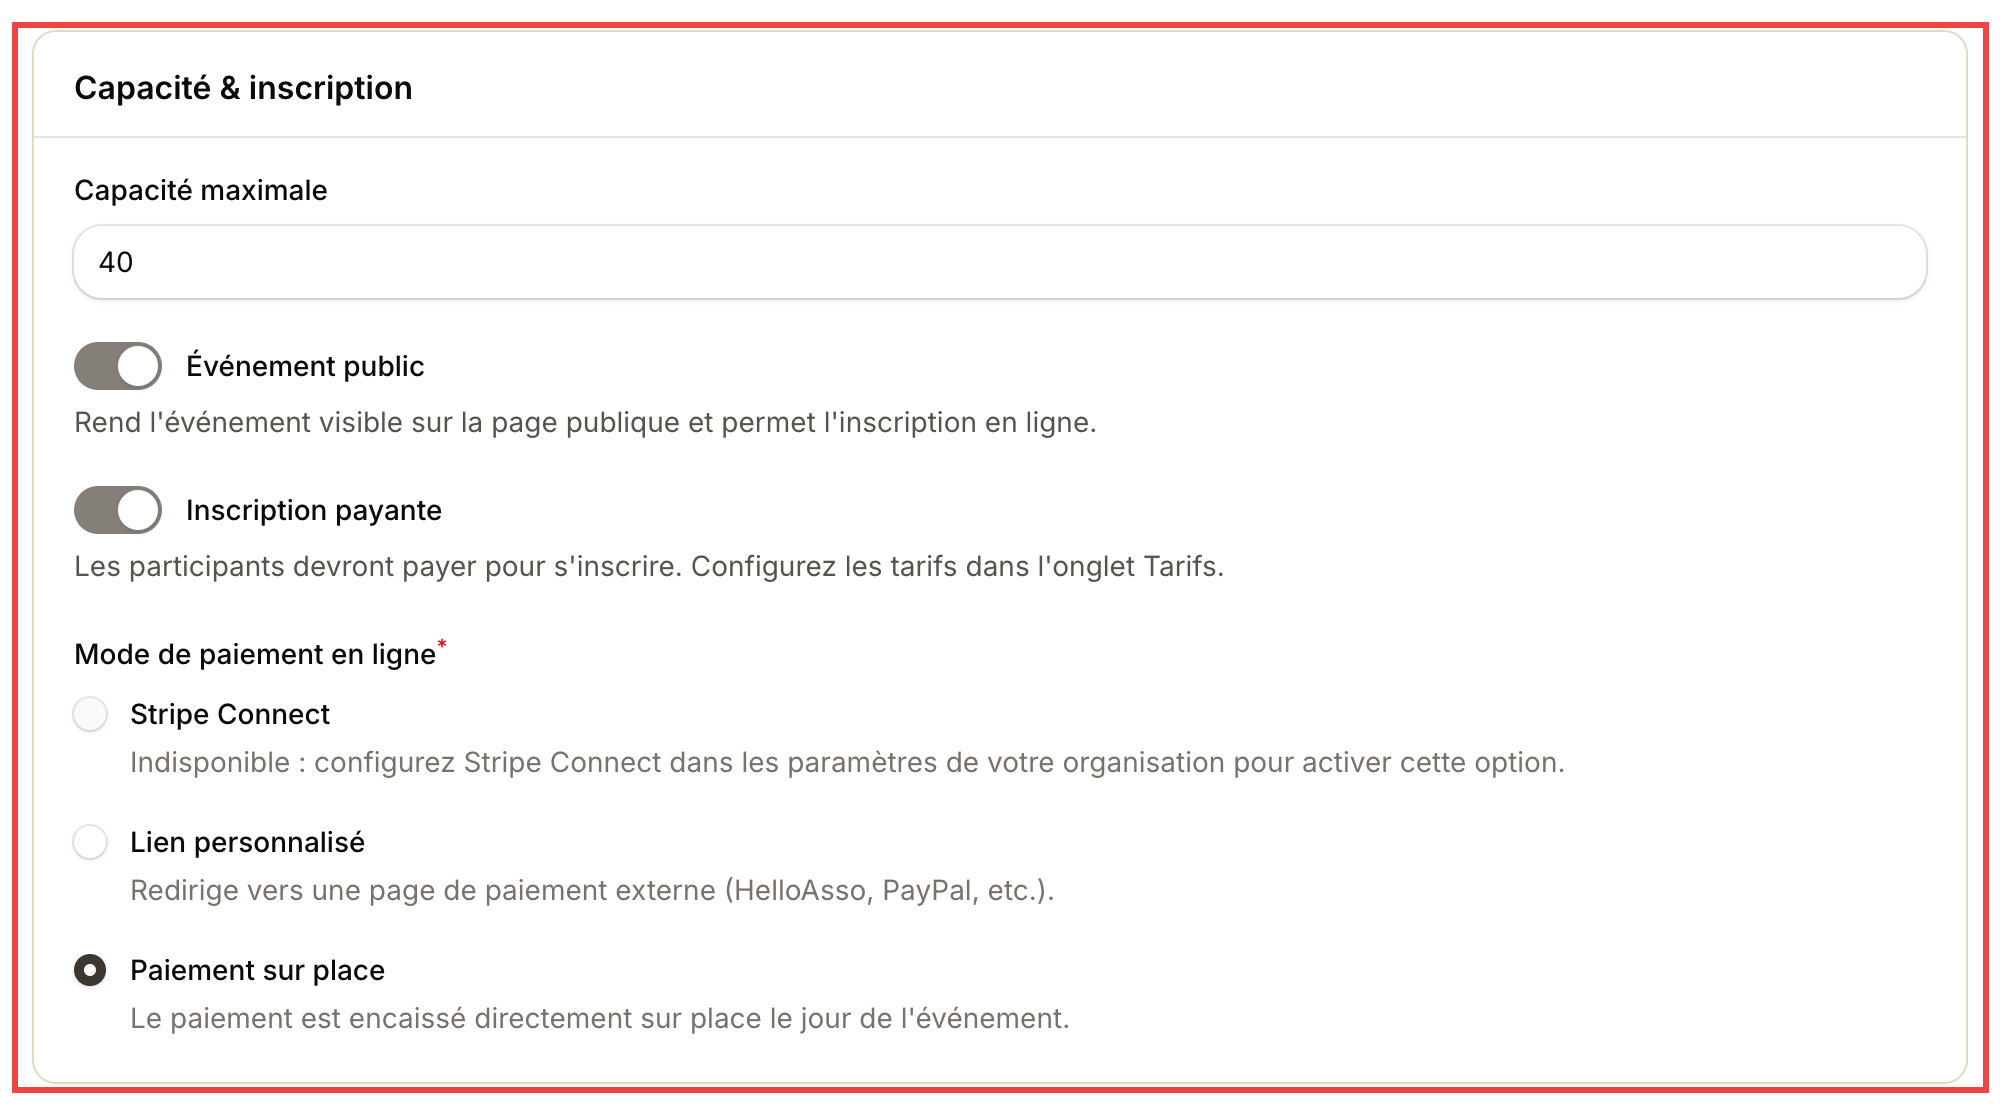
Enabling Paid registration adds a Pricings tab to the event editor where you set the price.
| Field | Used for |
|---|---|
| Max capacity | Beyond this: auto-routed to a waiting list |
| Public event | Visible on the public page. Off = admin-only registration |
| Paid registration | Enables billing. Off = registration confirmed immediately, no invoice |
| Online payment mode | Stripe Connect (card), external link (HelloAsso, PayPal) or pay on site |
Step 4 — Create the event
Create button at the top right. The event shows up in your list. You then unlock extra tabs:
- Pricings (if paid): add member / non-member / kids price.
- Sessions: if the event has multiple slots (e.g. Sat morning + Sat afternoon).
- Registrations: live track of confirmed participants.
- Check-in: scan tickets on the day.
Public URL
Once published, the event has its own URL:
https://join-kimono.com/{your-org}/events/{event-slug}
To share on social, newsletter, club bulletin board.
Use case — camp with 40 seats at €30
- Information: Name Master Tanaka Camp, description with timetable, category Camp.
- Location: Sat Nov 15 and Sun Nov 16, 10am-5pm, Paris Central Dojo.
- Capacity: 40, public yes, paid yes.
- Create → Pricings tab → €30 member, €45 non-member.
- Share the public link.
Use case — restrict by grade
On the public registration page, you can require a minimum grade (e.g. blue belt). Members below see the block reason instead of the register button.
Auto waiting list
When capacity is reached, new registrations go to Waiting list. If a confirmed attendee cancels, the first on the list is auto-promoted with a confirmation email.
On the day?
See Check-in by barcode to scan participants at the door.